About Me

My photo
Hi! My name is Grace and I'm from the great state of Minnesota! I currently reside in Los Angeles, California and this is where I share all of the things I'm up to! Come along with me, let's be friends! Check out my Instagram where I post more things and stuff! http://instagram.com/grace_mcquillan
Showing posts with label beauty. Show all posts

Tuesday, March 8, 2016

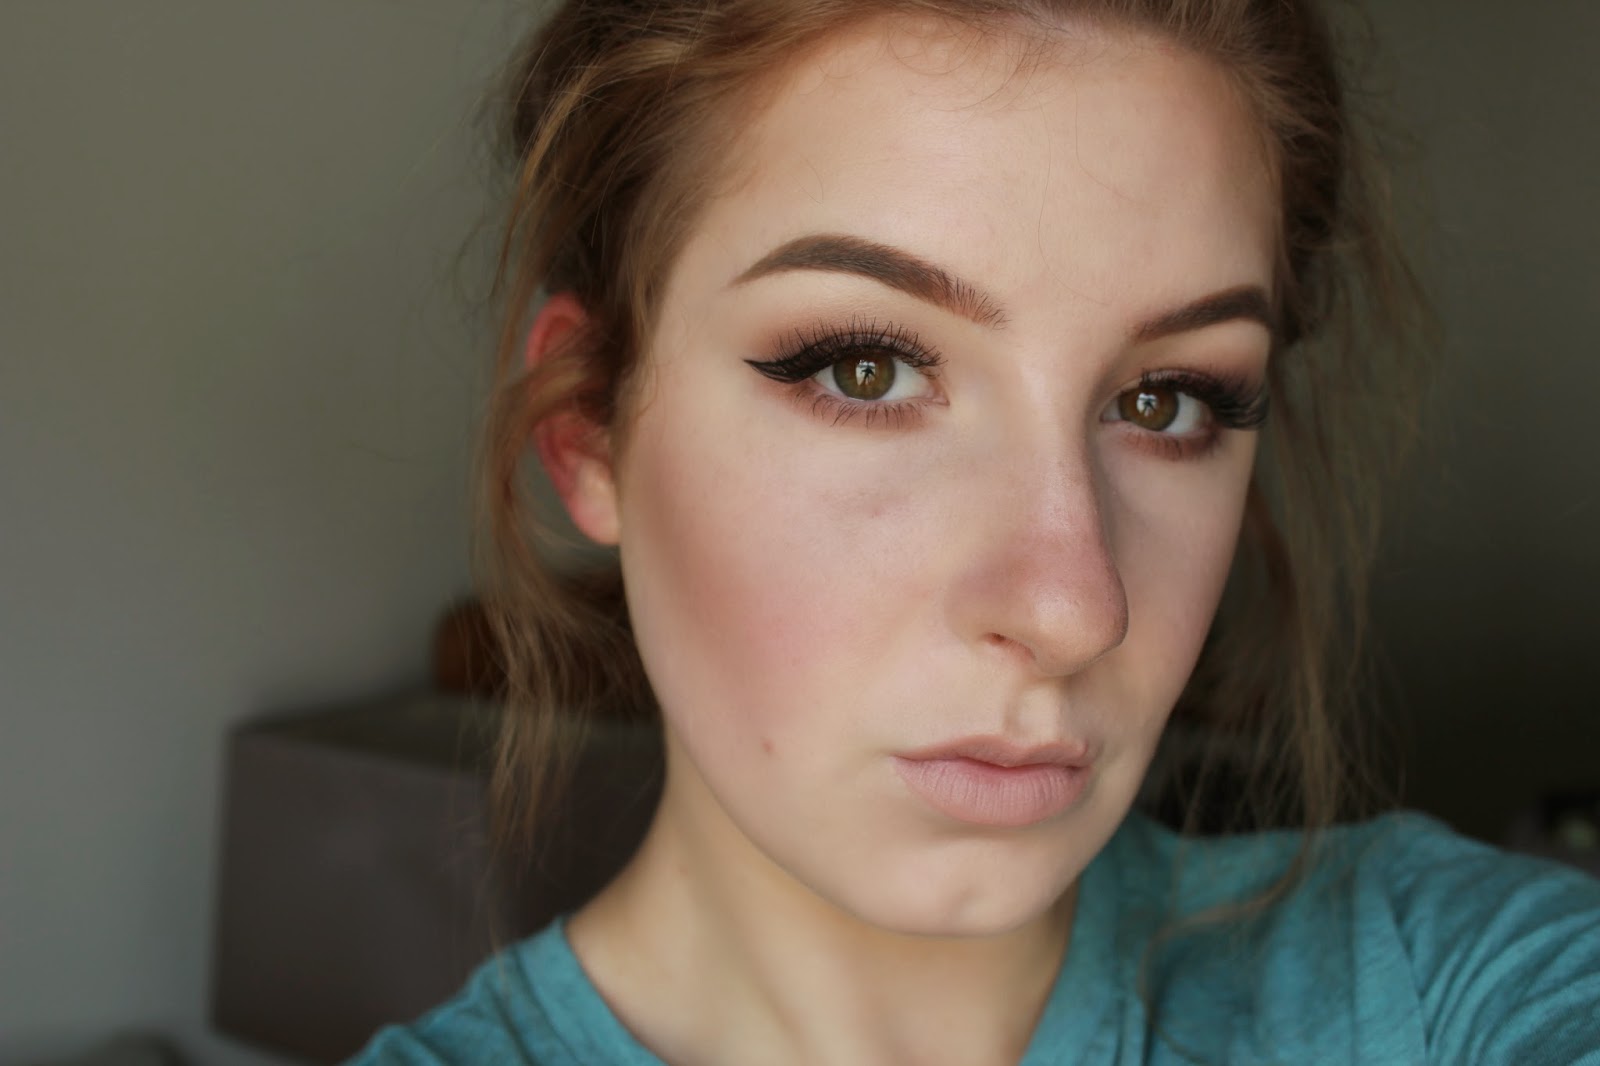
FOTD: Rose Gold Halo Eye


Here's my FOTD:

Face:

Hourglass Mineral Veil Primer
Dior Diorskin Star Foundation
NYX HD Concealer
Make Up Forever HD Powder
Benefit Hoola Bronzer
Hourglass Ambient Lighting Powder Diffused Light
Hourglass Ambient Lighting Blush Dim Infusion

Brows:

Anastasia Beverly Hills DipBrow Pomade Blonde
Bobbi Brown Brow Gel Clear

Eyes:

Bh Cosmetics 120 Color Palette 3rd Edition
L'oreal Voluminous Mascara Black
Salon Perfect Demi Wispies Lashes

Lips:

Maybelline The Nudes Lipstick Nude Lust

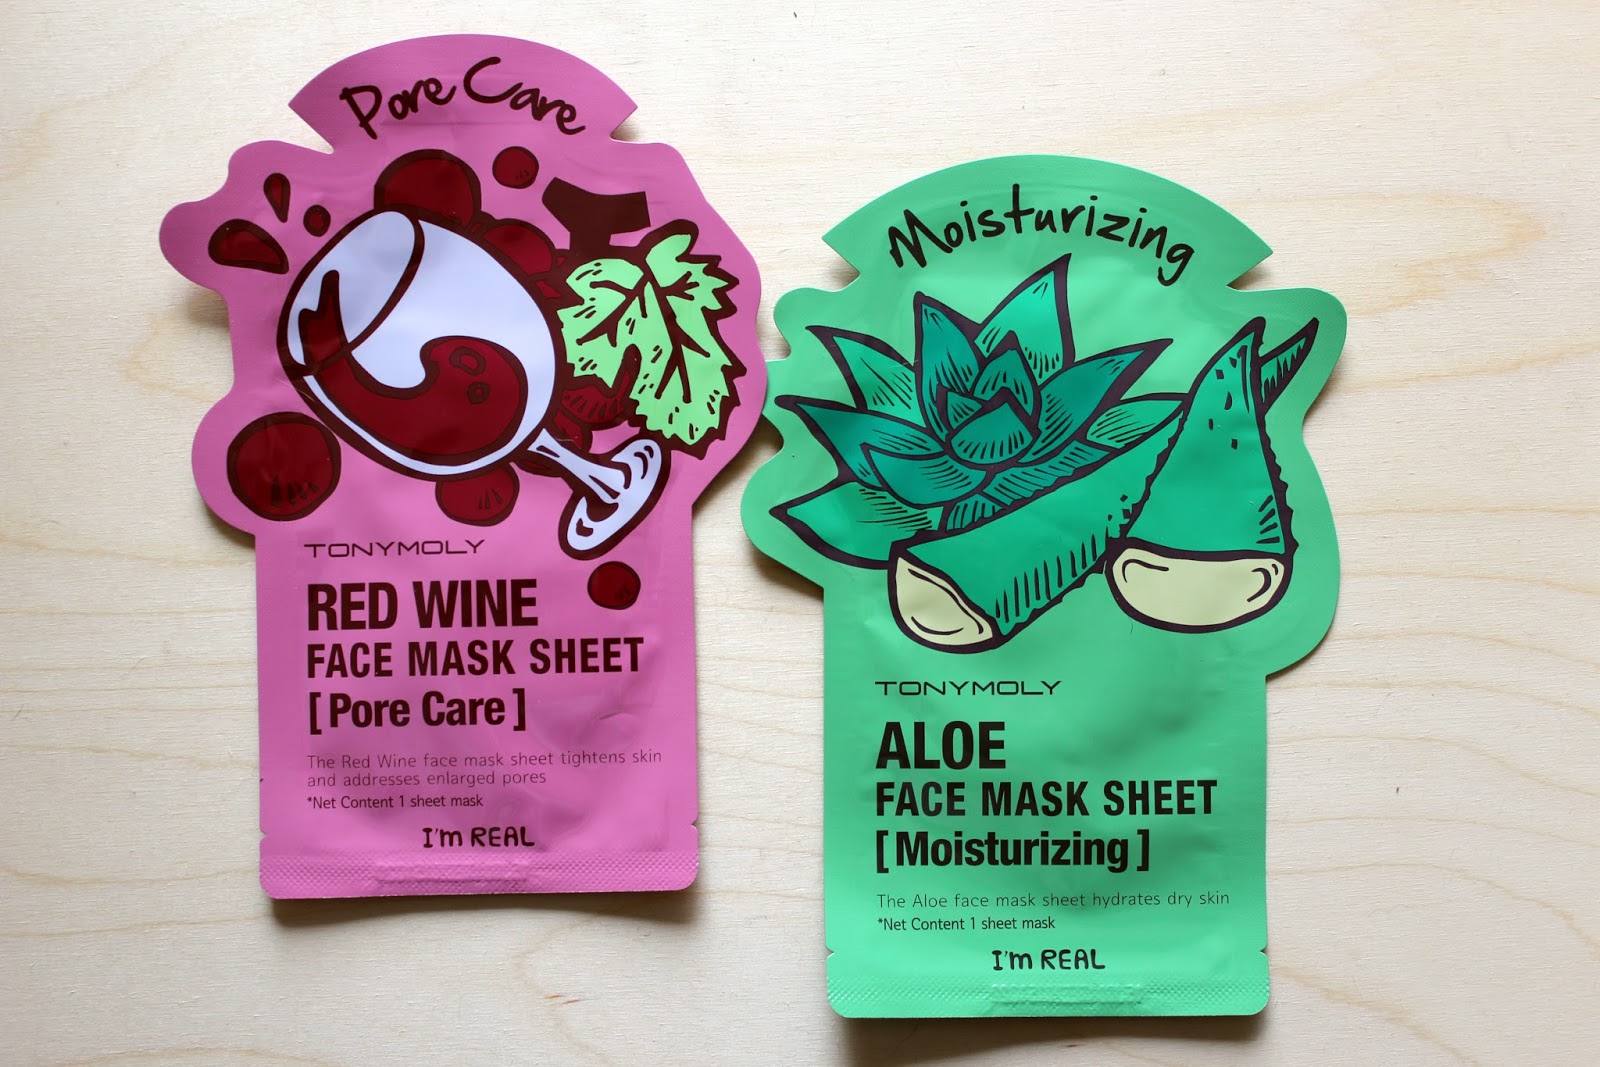
Review: Tony Moly Sheet Masks


Here's a quick little review on the Tony Moly sheet masks:

SPOILER ALERT, these masks are amazing!

Tony Moly is a Korean based beauty company that provides unique products at an affordable price tag. Not to mention the adorable packaging, these sheet masks are no exception! I tested out both the Red Wine Pore Care Sheet Mask and the Aloe Moisturizing Sheet Mask. The masks are made from a nice material, it's a fibrous cloth that is soaked in the product. The masks fit my face nicely and didn't slide off. Although I do prefer a sheet mask that is made out of a cellulose material, the material chosen for this mask makes sense, given the price ($7.50 for a two pack at Sephora). The masks contain just the right amount of product, there is enough to ensure the mask doesn't dry out during it's wear time, but also not so much that it drips everywhere.

Results:

Red Wine:

I found that my face looked hydrated and smooth. My pores looked noticeably smaller, however I wasn't a fan of the residue left on my face. It was a tad sticky. It's nothing that turns me off completely, just a bit annoying. Overall the results were what I was looking for.

Aloe:

This mask was my favorite of the two. It made my skin so glowy and soft. My face looked plump and supple and the dry patches on my skin had been quenched. Since this mask is formulated with Aloe the amount of inflammation and redness on my face was significantly reduced. Also, the residue left over was much less sticky.

If you're in the market for a new sheet mask, I would highly recommend these!

Thursday, February 11, 2016

My FOTD and Mini Review: Diorskin Forever Perfect Makeup


Product Deets:


Face:
Laura Mercier Primer OriginalDiorskin Forever 010NYX HD Concealer 01 and 04Laura Mercier Translucent PowderBenefit Hoola BronzerTarte 12 Hr Amazonian Clay Blush ExposedHourlgass Ambient Lighting Powder Diffused Light


Brows:
Anastasia Beverly Hills Dipbrow Pomade BlondeBobbi Brown Brow Mascara Clear


Eyes:
Lorac Pro Taupe in crease and lower lidTartelette Tease: Whisper all over and concentrated under brow and inner corner, Crush and First Kiss on lid, Heartbreaker in outer corner/outer creaseMarc Jacobs Velvet Noir Mascara Ardell Demi Wispies cut in half


Lips:
Kat Von D Everlasting Liquid Lipstick NosferatuBite Beauty Matte Creme Crayon Cognac


Here's a mini review of the new Diorskin Forever Perfect Makeup:


According to Sephora.com this foundation claims to be a non-oily demi-matte finish that provides even color correcting coverage and a 16 hour wear. I would agree with this description for the most part. It's definitely a demi-matte finish with a bit of luminosity and it also gives amazing coverage/color correction without looking heavy. However I think the 16 hour wear claim is a bit of an overstatement. The foundation looked nice on my skin for about 7 hours, but beyond that it was looking patchy around my blemishes and oily areas. I could also really feel it on my skin by the end of the day, so it was a bit uncomfortable. It will probably stay on your skin for 16 hours, but it's not going to be pretty! All in all, I'd still say it's a great base.

Stats:

Grade: A-
Price: $50 USD
Ounces: 1 oz (standard)
Formulation: Liquid
Finish: Demi-Matte
Wear: 9-10 hours


Tuesday, February 9, 2016

Review: Marc Jacobs Velvet Noir Mascara


I am absolutely in love with the new Marc Jacobs Velvet Noir Mascara. Let me breakdown why:

1. The formula is wet enough to build volume, but not so wet that it clumps everything together/weighs the lashes down. It also has a bit of a whipped texture that creates a beautiful feathery texture.

2. The brush shape is genius. The hourglass curvature lets you to build volume where the brush is fat and comb through the lashes where the brush is thin. This allows you to both separate and plump.

3. The formula doesn't flake or smudge. This is perhaps my biggest qualm with non-water proof formulas. I usually end up with mascara under my bottom lashes, however my lower lid stayed squeaky clean!

4. And finally, the packaging is classy AF.


More info:

Price: $26.00
Formulated without: Parabens, Sulfates, Phthalates (sephora.com) 

Wednesday, September 17, 2014

Beauty Blender Cleanser Dupe!

Whaddaup today I'm bringing you a dupe for the Beauty Blender Cleanser. I've been searching high and low for a cheaper alternative to the beloved Beauty Blender Cleanser.


When the cleanser first came out I was thinking, "why would I ever spend that much money on soap?" I figured I'd just use regular old hand soap/dish soap to clean my Beauty Blender. So when it came time to deep clean it I reached for my dish soap, lathered up...aaaaaaand it was still stained. No matter how much soap I used, how long I soaked it, the makeup stayed wedged in the fibers of my sponge. Frustrated with how disgusting it looked and, more importantly, how much I was breaking out from it, I bought the Beauty Blender Cleanser. Admittedly, the cleanser worked great! It got out all of the embedded makeup and my Beauty Blender looked good as new. I was pretty pumped, however the price, listed at $15.95 for the solid and $17.95 for the liquid, was a huge downer.


So, once again I found myself on the hunt for a dupe. Then in a brain blast of epic proportions I remembered good old Ivory soap. My mom uses it to remove stains like wine, blood, chocolate etc. Crossing my fingers, and all other crossable body parts, I washed my Beauty Blender with the Ivory soap. A chorus of angels sang as the makeup came out with ease. I was way too giddy about this discovery and to make it even better Ivory soap costs a fraction of the Beauty Blender Cleanser, sitting at $3.97.


So there you have it, listed below is a comparison of the two products and how well I think they cleansed. I hope this helped out some of you on a budget! Let me know of any other favorite dupes you have in the comments below!


Check ya later!


xxgk


Beauty Blender Cleanser:
Solid (1 oz, 1 count) : $15.95
Liquid (6 oz, 1 count) : $17.95


Pros: It definitely does what it says it will do. It gets out old makeup with ease, conditions and it smells nice.
Cons: It costs a lot of money.


Ivory Soap:
Solid (3.1 oz, 10 count...10 COUNT) : $3.97


Pros: It gets out all the old makeup/stains and its antimicrobial so it breaks down bacteria even better than antibacterial soap. It also costs $0.40 per soap, which is ridiculous.

Cons: It doesn't necessarily condition the Beauty Blender, (but as far as I've noticed it doesn't dry it out).


I'm back...again!

Gah! I've been neglecting this blog...agian. Long story short, school began. But now that my schedule is all set I'm hoping to get this wheel rolling again. For starters here is a bunch of FOTDs I never posted! If you'd like tutorials on any of these comment below. Enjoy!

...Oh and stay tuned because I've got some actual posts coming up of my recent favorites, product reviews and some tips and tricks!


Friday, June 27, 2014

Face of the Day: Graphic Liner

Hi again! Here's another face of the day, enjoy!

Graphic Liner:


Product List: 

Face: 

Base:Nars Sheer Glow in Gobi, MAC Prolongwear Concealer in NC15, Rimmel Stay Matte in 001 Transparent. 
Contour: Nars Laguna Bronzer. 

Brows: Anastasia Beverly Hills Brow Wiz in Auburn, Dipbrow in Blonde, Maybelline Clear Mascara. 

Eyes: Lorac Pro Palette: Taupe through crease, Cream as browbone highlight and inner corner highlight, Urban Decay Naked 2 Palette: Tease in outer crease and on lower lid, Urban Decay 24/7 Glide on Eye Pencil in Bourbon, NYX Collection Noir Black Liquid Liner, L'oreal Voluminous Mascara. 

Lashes: Salon Perfect in Demi Wispies. 

Lips: NYX lip liner in Pale Pink, Maybelline Nudes lipstick in Bare All in the center of lips, NYX lipstick in Honey lightly dabbed over top.

Laters,

xxgk

HOW TO: Dramatic Smokey Eye

Tutorial time, enjoy! Here's the link to my album on Imgur: http://imgur.com/a/nmNvO


1. Here's a little before shot, lookin fly.


2. Start by priming your eyes. Blend in your primer using your fingertips or a small brush. I like to use concealers that don't crease, both the Maybelline Age Rewind and MAC Pro Longwear are great options. I prefer concealers like these over primers because they blank out any discoloration as well as provide creasless staying power.


3. I also went ahead and did my base and brows to make this a more pleasurable experience!


4. Next start defining your crease with a shade that is a few shades darker than your skin tone, this will create a smooth transition between the darker shadows we'll be using later. I used Nars Laguna Bronzer as my transition color. Laguna is a medium/light warm brown with a slight shimmer. Generally I wouldn't use shimmer in my crease but shimmery shades tend to blend easier (which is essential for this look) and most of the other shades we'll be using are matte so it'll balance out fine.


Using windshield wiper motions and a light hand I used a Sigma E25 brush to blend in the product from the outer to inner crease. Since this look is pretty blown out, I took a bit more product and blended it upwards, slightly above my crease. I created a bit of a "cat eye" shape because I want my eye to look more lifted.


5. Next take a slightly darker, warm tone brown, I used Sable from the Lorac Pro Palette. The goal here is to deepen the crease a bit, adding more dimension.


I took Sable on a Crown Brush SS012 Deluxe Crease Brush and buffed it into the outer half of my crease. Make sure not to bring this color above Laguna, as we want to create a blended look. I blended out any harsh lines with the Sigma E25 brush used earlier.


6. Next take a black shade with a flat shader brush and pat it on the lid. I used an SS011 Deluxe Oval Shadow Brush from Crown Brush. Be sure to keep this shade on the lid only. Blend out any harsh lines, but for the most part we want to keep the darkest shade low on the eye.


7. Then take any shimmery Taupe color, I used Pewter from the Lorac Pro Palette to keep it simple.


Take Pewter on a pencil brush and gently work it into the inner lid, blending it about 1/4 - 1/3 of the way across. I used another Crown brush for this.


8. Clean off the pencil brush and use it to define your lower lid with the same warm brown (Sable) we used earlier. Follow the curvature of your eye until you get about 7/8 (getting mathematical up in here) of the way across your lower lid.


Leaving space between your inner corner and where we stopped with Sable, drag whatever product is left on the pencil brush down a bit, tapering off how much pressure you apply as you go. Do this step very slowly and carefully, with a very light hand. You can always build up more product to make it more defined.

9. Then take a blending brush and lightly blend out the product to make it soft and diffused.


10. To add a bit more dimension to the lower lid, take a black shade on an angle brush and push it into the lower lash line. Take this color only about 1/2 way across the lower lid, again to keep the look soft. Then blend out the black with a small blending brush. I cleaned off the SS012 Deluxe Crease Brush and used that.


11. Next take a shade that's a couple shades lighter than your skin tone and use this to define your brow bone and inner corner. I used Cream from the Lorac Pro Palette on a small flat shader brush from Urban Decay (Good Karma Shadow Brush). I also used Cream on the same Urban Decay brush to clean up the lower lash line a bit and make the graphic detail look a bit more polished.


12. Then add your favorite black liner. I used one with a glossy finish to help it stand out against the black shadow.


To be exact, I used NYX Collection Noir Liquid Black Liner.


13. Then add a coat of mascara on the top and bottom lashes. I used Covergirl Clump Crusher on my top lashes and L'oreal Voluminous Waterproof on my bottom lashes.


14. If you'd like you can add false lashes. I find this step necessary because the look is quite dramatic and looks unfinished without them. I used Salon Perfect Lashes in Demi Wispies.


Boop! You’re all done!


Full Product List:

Face:


Base: Smashbox Liquid Halo HD Foundation in 01 mixed with Revlon Colorstay in 150 Buff, MAC Pro Longwear Concealer in NC15, Rimmel Stay Matte Powder in 001 Transparent.
Contour: L'oreal True Match Powder in W6, Nars Laguna Bronzer.


Lips: 
NYX Lip Liner in Pale Pink, NYX lipstick in Honey, NYX Pump it Up lip plumping gloss in Elizabeth 07.

Thanks for reading!

xxgk