About Me

My photo
Hi! My name is Grace and I'm from the great state of Minnesota! I currently reside in Los Angeles, California and this is where I share all of the things I'm up to! Come along with me, let's be friends! Check out my Instagram where I post more things and stuff! http://instagram.com/grace_mcquillan
Showing posts with label dewy skin. Show all posts

Wednesday, March 16, 2016

Review: Holika Holika Aqua Petit Jelly BB


I recently tried out the Holika Holika Aqua Petit Jelly BB, and I've got some mixed feelings about it. Holika Holika is a Korean brand, and if you don't know, the Korean beauty creators are the OGs of the BB (Beauty Balm) craze. Typically Korean BBs and beauty philosophy in general, differ from the Western creation of the BB. Korean BBs tend to have more coverage and offer more skin benefits compared to Western BBs.

The Holika Holika Aqua Petit Jelly BB has gathered a good amount of hype from both Korean beauty gurus and Western beauty gurus. Naturally I was excited to test it out.

First things first, the packaging is obviously adorable. The BB is housed in a glass bottle, which is great quality. Once you unscrew the top you'll notice there is a wand attached. This is meant to be the applicator, it looks kind of like a spatula. I'm not the biggest fan of these types of applicators because they can be unhygienic, but at least it's plastic instead of a sponge "doe foot" applicator.

There are unfortunately only two shades to pick from for this BB. I chose shade #1 and luckily it matched me perfectly.The consistency of the BB is creamy but also a bit watery, which I found odd. When I first applied it, the formula seemed as though it was having a hard time blending in. Almost like it was separating on my skin. But after a bit of working it in, it did blend evenly. There is also a really nice cooling sensation as your're applying, which is great if you have irritated skin. The coverage is sheer but buildable to medium and the finish is a demi-matte, so it's ideal for combo to oily skin types.

I tried this formula with and without a primer, honestly I prefer to wear it without a primer. I found it was more difficult to blend in with a primer and I also found it separated on my skin more throughout the day.

With that said, this is not a long wearing BB. I'd say it looks good for about 4-5 hours. By the end of the day (9 hour wear) most of the coverage around my nose, chin and jaw had disappeared. My skin was also pretty dewy by the end of the day, which I didn't mind, it actually added a really nice looking glow!

Overall I would rate this BB 6 out of 10. The color is perfect for me, but if you are a medium to medium deep skin tone, I would not recommend getting even shade #2. The coverage is nice, it just evens out the skin tone but allows your natural skin to show through. The consistency throws me off and it's a bit hard to work with. I've found the BB applies best with either a synthetic brush or a cushion poof. Both fingers and a classic sponge leave my skin looking patchy. The finish is exactly what I was looking for, it's beautiful and super natural. The longevity of this BB was disappointing. I was hoping it would last longer than 4-5 hours, but if you're looking for something for casual everyday wear I'd say it's worth trying.

Thanks for reading!


Tuesday, March 8, 2016

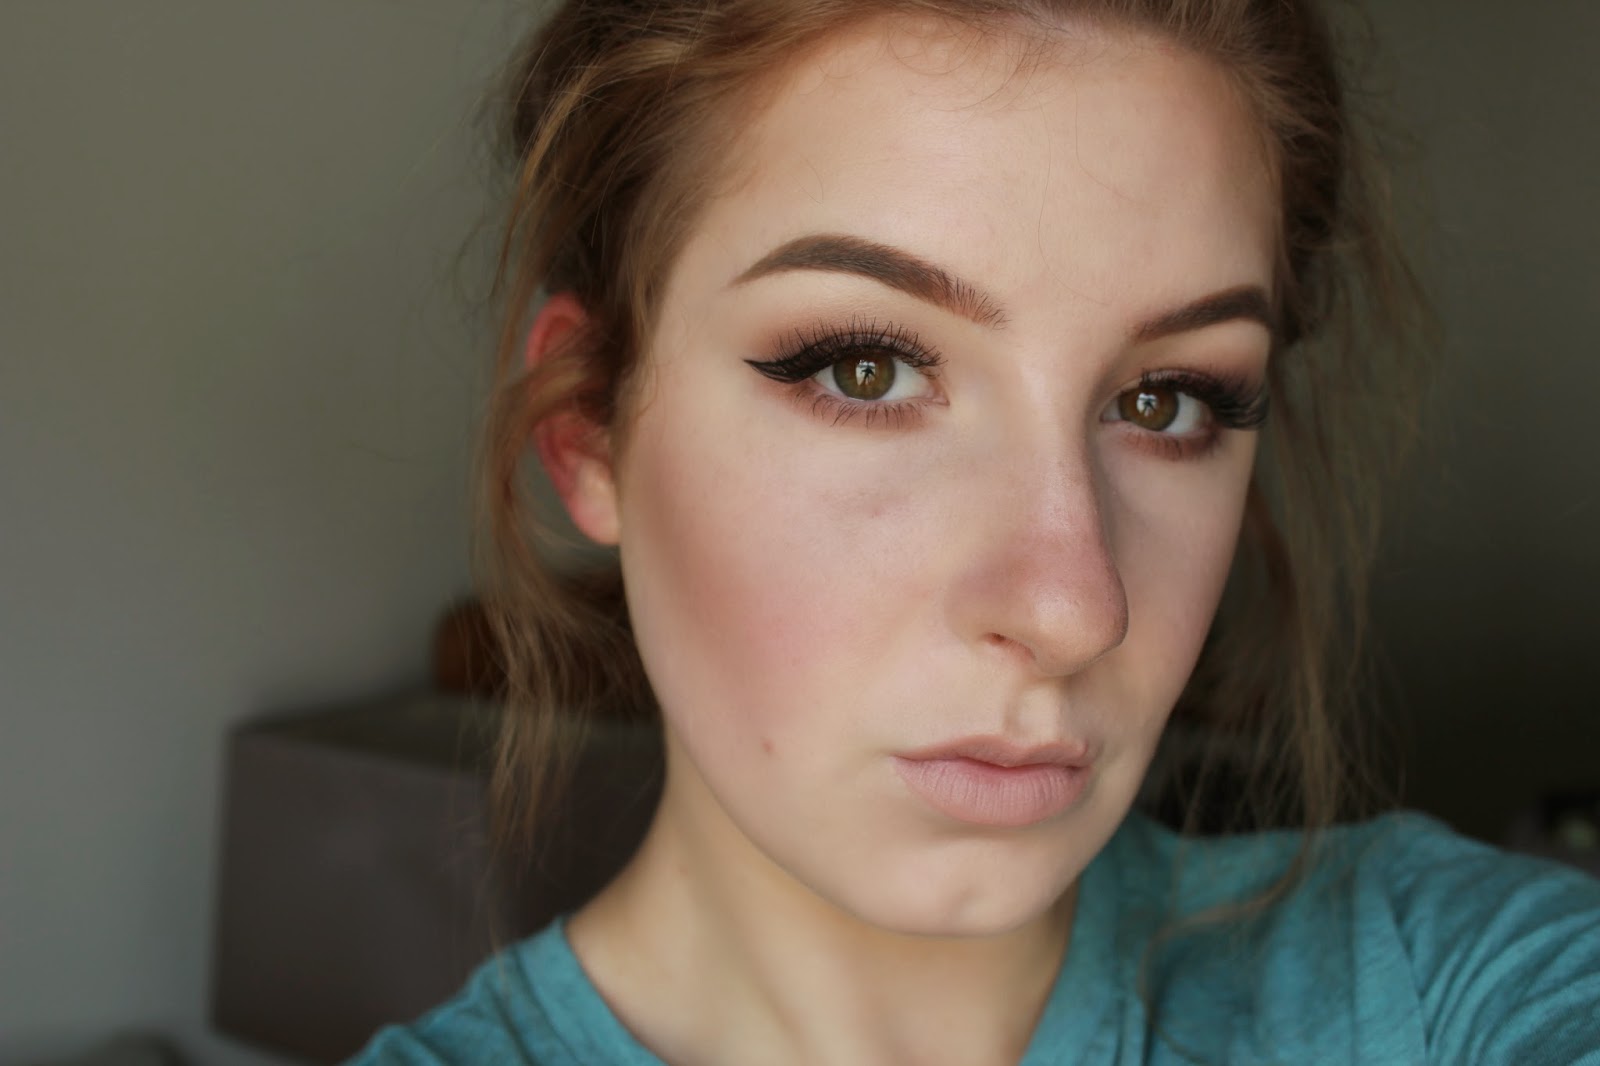
FOTD: Rose Gold Halo Eye


Here's my FOTD:

Face:

Hourglass Mineral Veil Primer
Dior Diorskin Star Foundation
NYX HD Concealer
Make Up Forever HD Powder
Benefit Hoola Bronzer
Hourglass Ambient Lighting Powder Diffused Light
Hourglass Ambient Lighting Blush Dim Infusion

Brows:

Anastasia Beverly Hills DipBrow Pomade Blonde
Bobbi Brown Brow Gel Clear

Eyes:

Bh Cosmetics 120 Color Palette 3rd Edition
L'oreal Voluminous Mascara Black
Salon Perfect Demi Wispies Lashes

Lips:

Maybelline The Nudes Lipstick Nude Lust

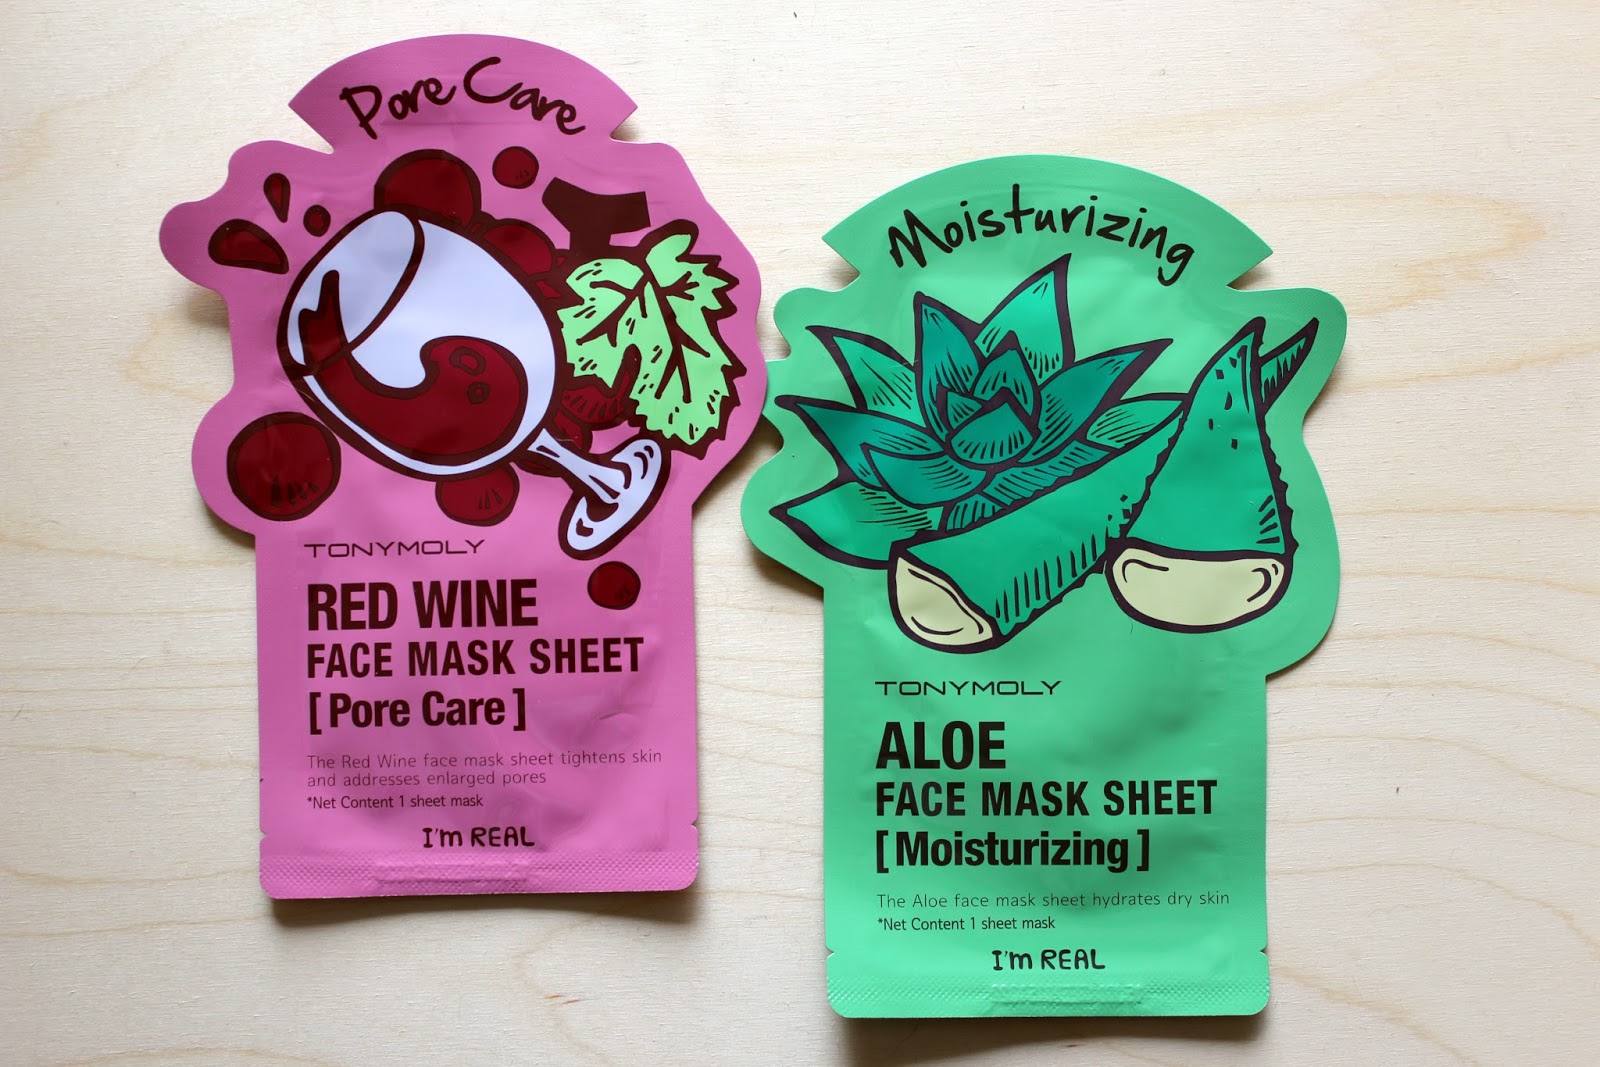
Review: Tony Moly Sheet Masks


Here's a quick little review on the Tony Moly sheet masks:

SPOILER ALERT, these masks are amazing!

Tony Moly is a Korean based beauty company that provides unique products at an affordable price tag. Not to mention the adorable packaging, these sheet masks are no exception! I tested out both the Red Wine Pore Care Sheet Mask and the Aloe Moisturizing Sheet Mask. The masks are made from a nice material, it's a fibrous cloth that is soaked in the product. The masks fit my face nicely and didn't slide off. Although I do prefer a sheet mask that is made out of a cellulose material, the material chosen for this mask makes sense, given the price ($7.50 for a two pack at Sephora). The masks contain just the right amount of product, there is enough to ensure the mask doesn't dry out during it's wear time, but also not so much that it drips everywhere.

Results:

Red Wine:

I found that my face looked hydrated and smooth. My pores looked noticeably smaller, however I wasn't a fan of the residue left on my face. It was a tad sticky. It's nothing that turns me off completely, just a bit annoying. Overall the results were what I was looking for.

Aloe:

This mask was my favorite of the two. It made my skin so glowy and soft. My face looked plump and supple and the dry patches on my skin had been quenched. Since this mask is formulated with Aloe the amount of inflammation and redness on my face was significantly reduced. Also, the residue left over was much less sticky.

If you're in the market for a new sheet mask, I would highly recommend these!

Wednesday, September 17, 2014

I'm back...again!

Gah! I've been neglecting this blog...agian. Long story short, school began. But now that my schedule is all set I'm hoping to get this wheel rolling again. For starters here is a bunch of FOTDs I never posted! If you'd like tutorials on any of these comment below. Enjoy!

...Oh and stay tuned because I've got some actual posts coming up of my recent favorites, product reviews and some tips and tricks!


Friday, June 27, 2014

Face of the Day: Graphic Liner

Hi again! Here's another face of the day, enjoy!

Graphic Liner:


Product List: 

Face: 

Base:Nars Sheer Glow in Gobi, MAC Prolongwear Concealer in NC15, Rimmel Stay Matte in 001 Transparent. 
Contour: Nars Laguna Bronzer. 

Brows: Anastasia Beverly Hills Brow Wiz in Auburn, Dipbrow in Blonde, Maybelline Clear Mascara. 

Eyes: Lorac Pro Palette: Taupe through crease, Cream as browbone highlight and inner corner highlight, Urban Decay Naked 2 Palette: Tease in outer crease and on lower lid, Urban Decay 24/7 Glide on Eye Pencil in Bourbon, NYX Collection Noir Black Liquid Liner, L'oreal Voluminous Mascara. 

Lashes: Salon Perfect in Demi Wispies. 

Lips: NYX lip liner in Pale Pink, Maybelline Nudes lipstick in Bare All in the center of lips, NYX lipstick in Honey lightly dabbed over top.

Laters,

xxgk

Wednesday, June 11, 2014

How To: Dewy Complexion for Oily Skin

Another week has passed so that means I've got another fully loaded post for your viewing pleasure! On the menu for today I'm serving up a tutorial, with pictures and everything! As you can tell from the title, today's look is going to be all about how to achieve a dewy complexion, EVEN if you have oily skin. Having a luminous look works well all year round, but where I live it's summer and that means dewy skin season is in full swing. So let's begin!


Yep that's my naked face, deal with it.

1. Start off with a clean, moisturized face. So far I've done my morning skin care routine (which you can see in a previous post if you'd like more information and the products I use).


2. Moving on to primer, I used one and a half pumps of my L'oreal Magic Lumi Light Infusing Primer to give my skin that dewy look. I used my fingertips to massage in the product, making sure it is evenly distributed all over my face. This product won't really help control oil, but it will give the illusion of luminous skin instead of shiny skin.


3. Next I used the Wayne Goss Method to help control oil and minimize large pores (if you don't know who he is, then get on it here). I lightly dusted some translucent powder over my T-zone, where I get most oily and have the largest pores. I used Urban Decay Razor Sharp Ultra Definition Finishing Powder on a fluffy kabuki brush by E.L.F.


4. Moving on to foundation. I used Revlon Colorstay Whipped in the shade Buff. I'm not the biggest fan of the packaging, as you have to dip your fingers in the pot which can create bacteria build up, but the product itself is amazing for people with oily skin! I find the longer I wear this foundation the better my skin looks, plus it keeps me oil free pretty much all day! Anyways, I took the product on a C439 Infinity DLX Round Buffer brush by Crown Brush and worked the foundation in using a firm hand. I buffed it around in small circles until the product was fully blended in. Then I took a damp Beauty Blender and went over my entire face with light dabbing motions just to blend further.


5. On to concealer. Here I used MAC Pro Longwear Concealer in the shade NC15. I pumped about 3/4 of a pump onto the back of my hand and then, using my finger tips, I dotted it on the areas of my face outlined below. I blended in the product using my Real Techniques Expert Face Brush. Then I went over the concealed areas with my Beauty Blender to, again, blend further. The areas outlined below are areas that I want to highlight as well as conceal. MAC Pro Longwear works to accomplish both of these things. Because I have oily skin, I want to highlight my face with a matte shade that is one to two shades lighter than my actual skin tone. I do this instead of using a powder highlight with shimmer because on people with oily skin this tends to look overdone and too shiny.


6. More concealer, woo! In this step, I just took my Maybelline Fit Me Concealer in Light and dabbed it on any blemishes. To blend it in I used a clean fingertip and gently dabbed around and on the blemish until it was concealed.


7. Then I took a correcting powder, this one is by Physician Formula, on a Real Techniques Deluxe Crease Brush (which is fabulous for blending in concealer or small amounts of powder) and went over any blemishes that still had redness peaking though. To cover the redness I used a mix of the yellow powder and green powder because these two colors counteract it. The pink color is more for brightening dark circles under the eyes and since I already did that with my Pro Longwear concealer, using this color is unnecessary and I rarely find use for it.


8. Then I took Tarte Amazonian Clay Full Coverage AirBrush Foundation in Fair Honey on the same Real Techniques Crease Brush and went over any green spots from the step previous.


9. Next, my favorite part...contouring! I used Nars bronzer in Laguna to sculpt my face. Laguna is a bronzer that has a very slight shimmer in it to give my face more of a glow without looking too shiny. When I don't want dewy looking skin I stick to a matte bronzer like Benefit's Hoola bronzer. I took Laguna on an SS015 Deluxe Tapered Powder Brush from Crown Brush's Syntho line, but you could use any small/medium powder brush, and using a light hand, I buffed it onto my jawline, forehead, into the hallows of my cheeks and the sides of my nose. If you would like a more in depth contouring tutorial leave a comment down below or on my Instagram.


10. Blush is the next step. I've been enjoying light mauve toned pinks lately so for this tutorial I used this one from the Bh Cosmetics Glamorous Blush Palette. I took this shade on the same Crown Brush SS105 from above and lightly dusted it on my cheekbones (not the apples of my cheeks, because I have a lot of redness in my skin already) and swiped upwards towards the top of my ear.


11. Lastly I spritzed a light coating of Urban Decay All Nighter Makeup Setting Spray all over my face. This will help my makeup last all day, control oil and help reduce that powdered look from all the powder products I used.


That's the finished look! I hope you enjoyed and learned something helpful!


And here's the dewy skin look in action! I'll have this smokey eye look tutorial up on Monday at 1 PM Central time!


Thanks for reading!

Laters,

xxgk